Getting Started
Installation
Track Command is a single .py file that runs inside DaVinci Resolve. No installer required — the only prerequisite is a free Python 3 install.
Before You Start — Python 3
DaVinci Resolve only runs .py scripts if Python 3 is installed on your machine. Download the free installer from python.org/downloads. If you feel more comfortable getting it through Resolve directly, open the console (Workspace → Console) — when Python isn’t detected, Resolve shows a link to the same Python 3 download.
- Download Track Command 1.1.py from the suite download page.
- Copy it to:
~/Library/Application Support/Blackmagic Design/DaVinci Resolve/Fusion/Scripts/Utility/
On Windows: C:\ProgramData\Blackmagic Design\DaVinci Resolve\Support\Developer\Scripting\Scripts\Utility\
- Open DaVinci Resolve and open a project with a timeline.
- From the top menu choose Workspace → Scripts → Utility → Track Command 1.1.
- The window opens and reads your current timeline's audio and video tracks immediately.
Tip
Track Command reads the currently active timeline when it opens. If you switch timelines, hit Refresh to re-read the new timeline's tracks.
Interface
The Main Window
The window has three zones: the Rename Operations panel at the top, the Track Panels side-by-side in the center, and the Apply Changes controls at the bottom.
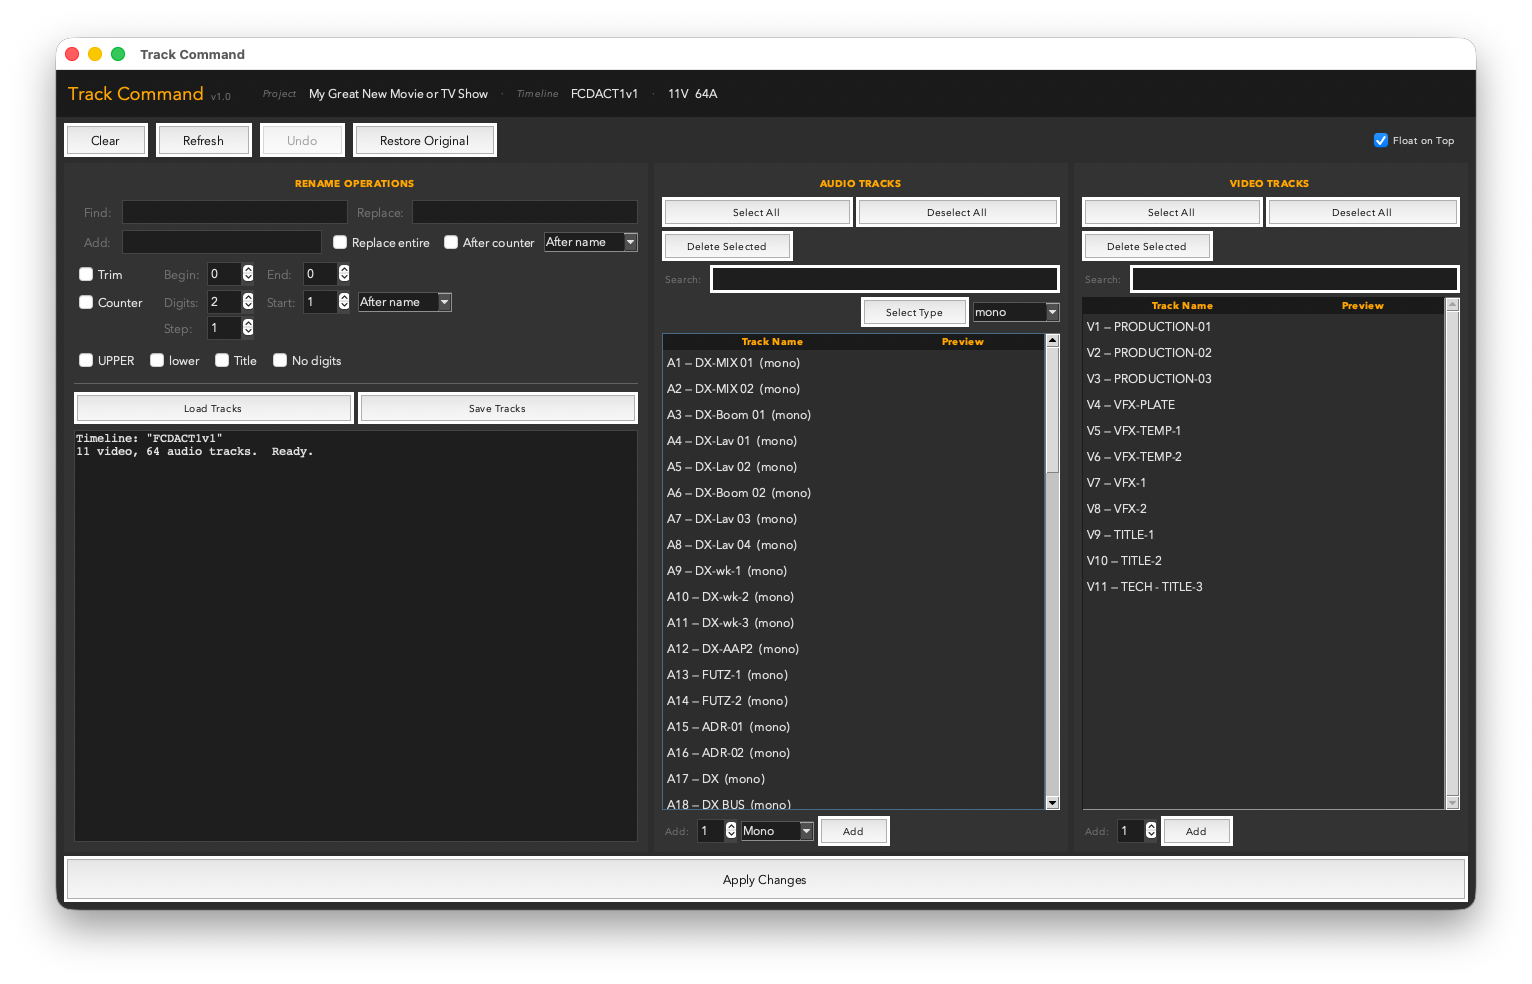
Track Command floating above a timeline — Audio tracks on the left, Video tracks on the right, rename controls at top.
Header & Toolbar
The top strip shows the connected project, timeline name, and track count. Below it are the four global controls.

Header bar (project, timeline, track count) and the Clear / Refresh / Undo / Restore Original button row.
- Clear — resets all rename operation fields without touching any tracks.
- Refresh — re-reads the current timeline's tracks. Use this after switching timelines in Resolve.
- Undo — reverses the last apply operation.
- Restore Original — puts every track back to the name it had when the app was opened or last refreshed.
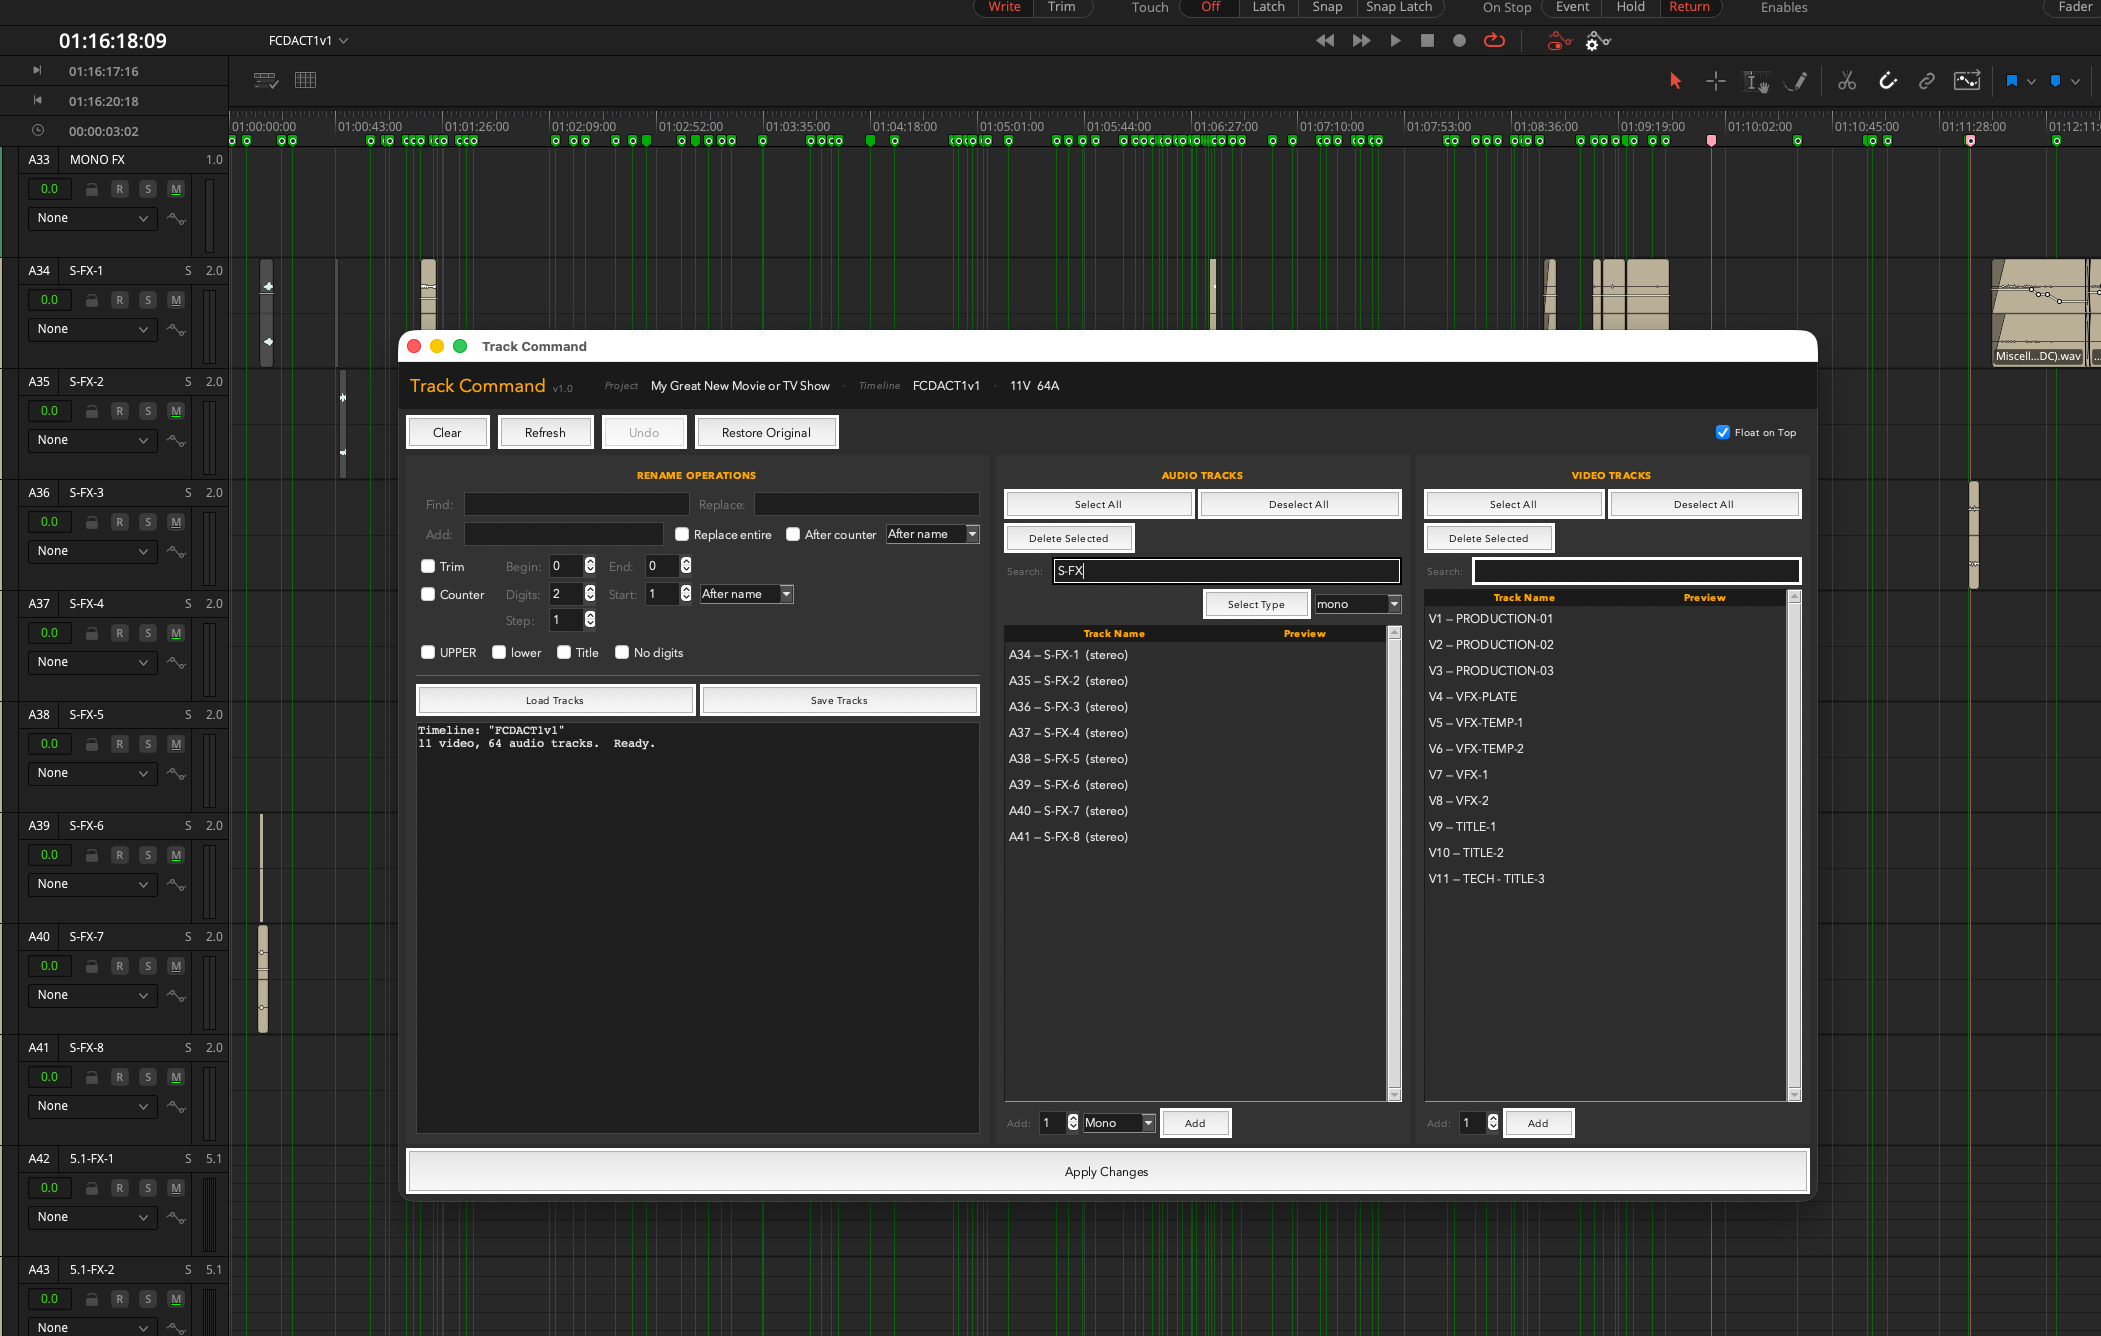
In context on a large multi-track timeline — the app floats above Resolve and stays out of the way.
Features
Rename Operations
The RENAME OPERATIONS panel works the same way as Clip Renamer Pro. All operations apply in a single pass to the tracks you've selected in the track panels below.

The full Rename Operations panel — Find/Replace, Add, Trim, Counter, and case options — plus Load Tracks and Save Tracks below.
Find & Replace
- Find — literal text to search for in track names.
- Replace with — the substitution text. Leave blank to delete occurrences.
- Replace entire name — replaces the full track name with the Replace text regardless of Find.
Add Text
- Add — text to insert.
- Position — Before name, After name, or After counter.
- After counter checkbox — shortcut to "After counter" position.
Trim
- Begin / End — strip a fixed number of characters from either end of the name.
Counter
- Digits — zero-padded width (
2 → 01).
- Start × Step — first counter value = Start × Step.
- Position — where the counter appears in the name.
Case Conversion
- UPPERCASE / lowercase / Title Case — applied after all other operations.
- Remove digits — strips all numerals from track names.
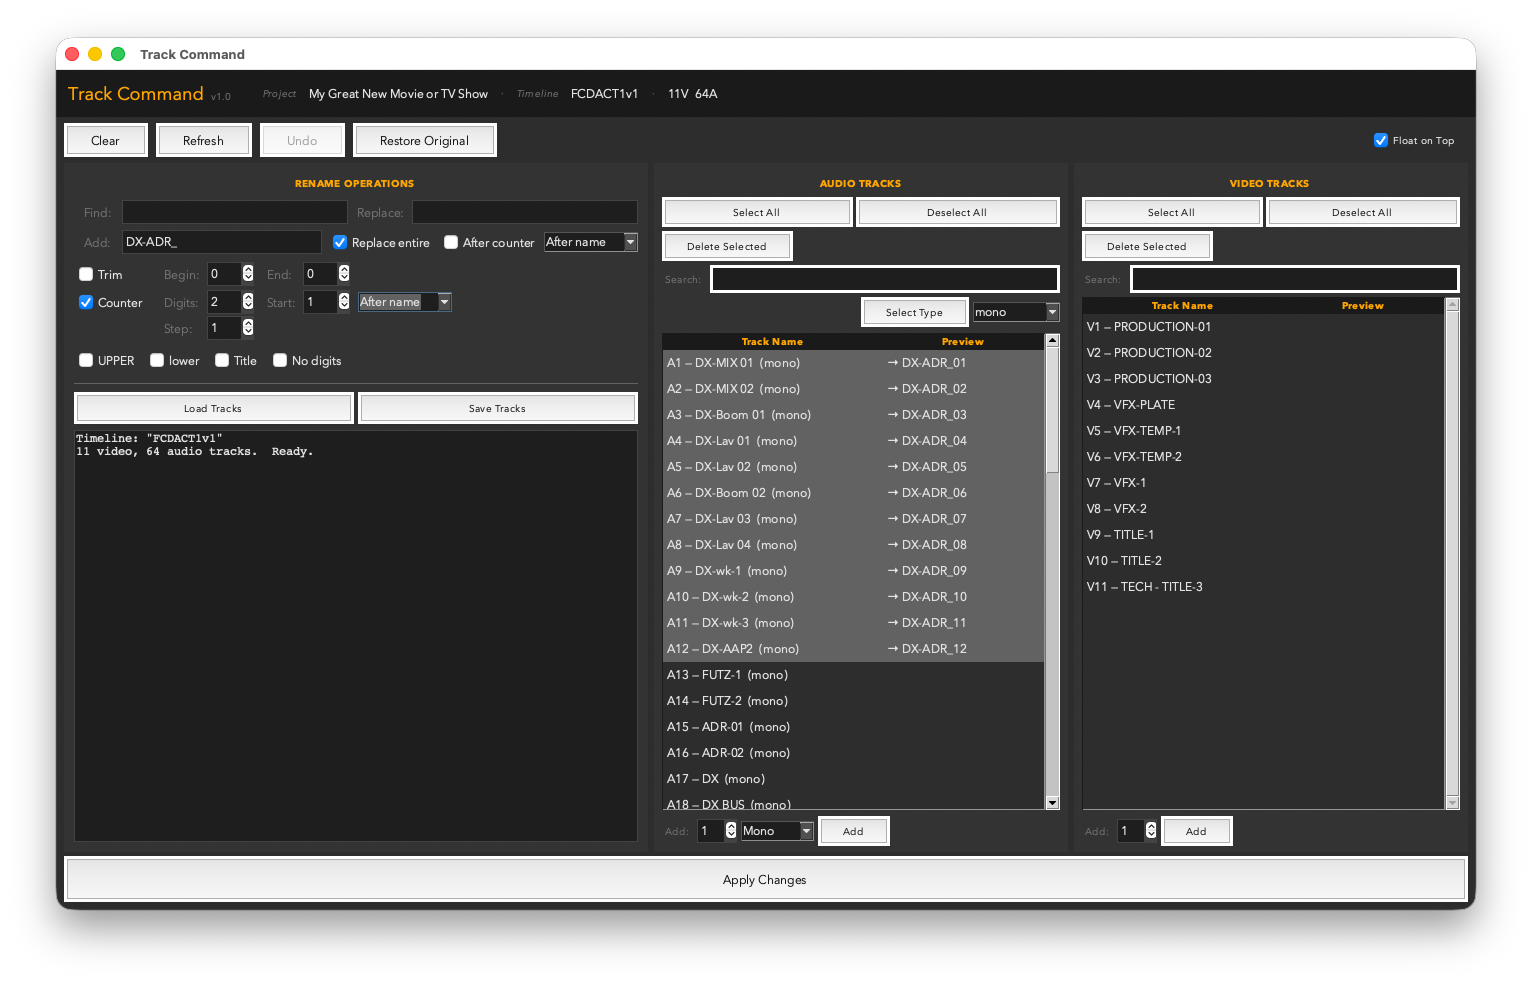
A rename operation in progress — the preview column on the right shows the result before anything is applied.
Tip
Use Replace entire name with a counter to set every track to a clean numbered name like VFX 01, VFX 02, VFX 03 in a single operation.
Features
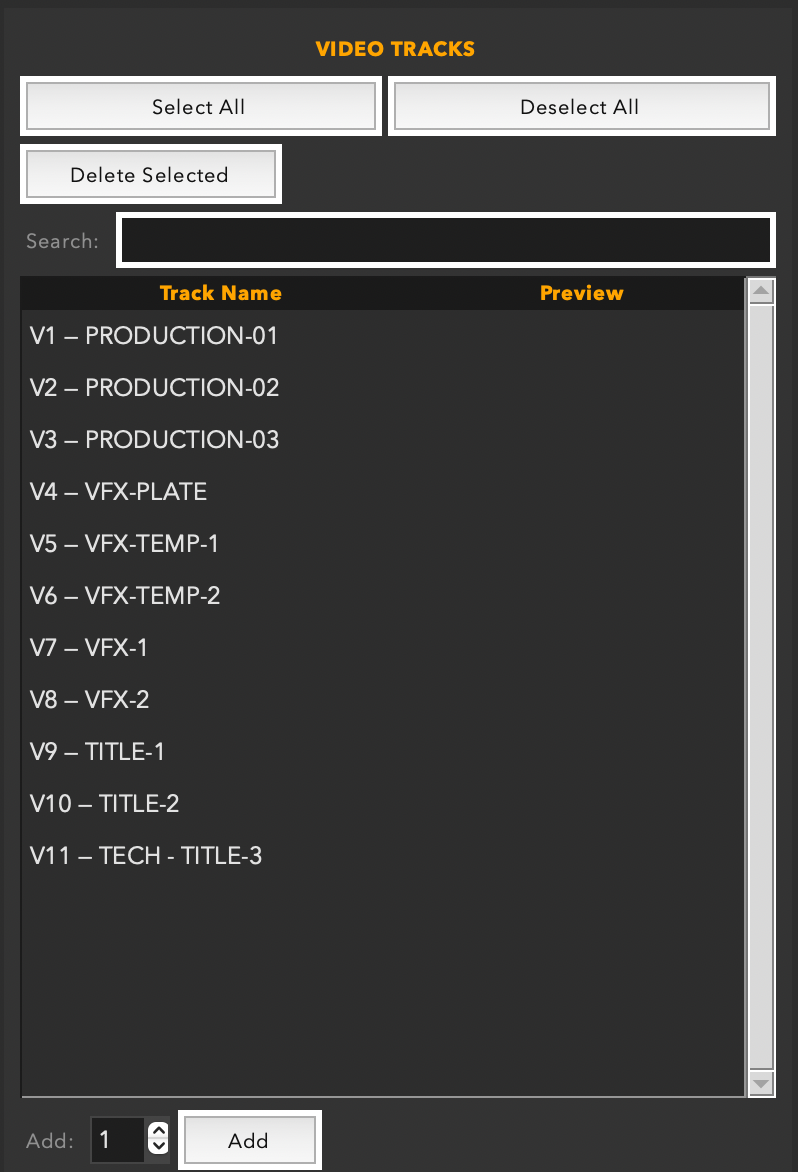
Track Panels
The center of the window is split into two panels: Audio Tracks on the left and Video Tracks on the right. Each panel lists every track in the timeline with its current name and a preview of the new name.
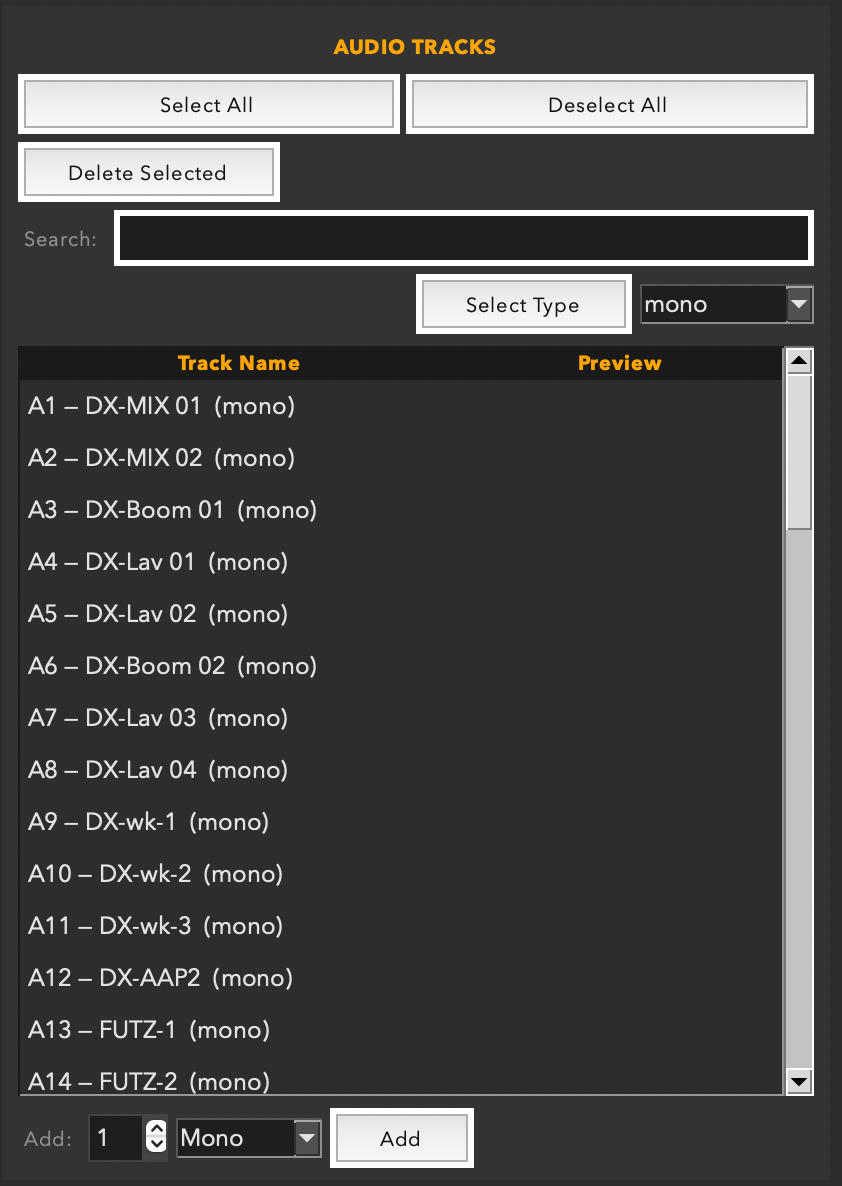
Selecting Tracks
Click any track row to select it. Hold ⌘ to add individual tracks to the selection, or hold Shift to select a range. Rename operations apply only to the selected rows.
Search within Panels
Each panel has its own search field at the top. Type to filter the track list by name — useful for finding specific tracks in a large timeline.
Preview Column
The right-side column in each panel shows a live preview of what the track name will become after the current operation is applied. The preview updates as you type, before you commit to Apply.
Features
Apply Changes
Track Command shows you a live preview of every rename — but nothing in Resolve changes until you click Apply Changes. The preview column is exactly that: a preview. Apply Changes is the button that turns it real.

The Apply Changes button at the bottom of the window — the one click that writes your changes to the timeline.
Don't forget to click it
The most common Track Command question is "why didn't my track names change?" — and the answer is almost always: Apply Changes wasn't pressed. Set your rename operation, check the preview column, then click Apply Changes to commit everything to Resolve.
The bottom of the window has three apply modes that control what happens to the renamed tracks.
| Mode | What it does |
|---|
| Change Timeline | Renames the selected tracks directly in the current timeline. The change is immediate and visible in the Resolve timeline panel. |
| Add to Timeline | Adds new tracks to the current timeline using the names from the operation. Existing tracks are not renamed. |
| Create New Timeline | Creates a brand new timeline and populates it with the tracks defined in the rename panel. Useful for setting up a template timeline with your standard track layout. |
Add to Timeline and Create New Timeline require a project to be open and connected. If Resolve is not connected, the button will show an error.
Features
Save & Load Track Sets
Track Command lets you save a named set of track names to a .txt file and reload it later — making it easy to apply your studio's standard track layout to any new timeline.
Save Track Set
Once you're happy with the track names in the panels, click Save Tracks. Choose a location and filename for the .txt file. Both the audio and video track lists are saved.
Load Track Set
Click Load Tracks and select a previously saved .txt file. The track names from the file will populate the panels, ready to preview and apply.
Studio Template Workflow
Build your standard track layout once — Dia 1, Dia 2, ADR, FX, Music, Mx Stem — save it as standard-mix-template.txt, and load it at the start of every new project. One click to set up 20 tracks correctly.
Safety
Undo
The Undo button (and ⌘Z) reverses the most recent rename operation applied to the timeline. It restores the track names to what they were before the last Apply Changes was pressed.
Undo covers the most recent Apply operation. Each subsequent Undo press steps back one more operation in the history.
Best Practices
Pro Tips
Set up your audio template first
Start every project by running Track Command with Create New Timeline using your standard audio track layout. From that point on, every timeline you create can inherit the same structure — no more renaming 24 tracks by hand in the Resolve timeline panel.
Rename in bulk, then tweak individually
Use the rename panel to set a base name across all tracks, then double-click individual cells in Resolve's track header to fine-tune the two or three that need custom names. Track Command handles the 90% case; Resolve handles the edge cases.
Use search to isolate track types
If your timeline has 30 audio tracks and you only need to rename the music stems, type "Mx" in the audio panel search to filter down to just those tracks before applying.
Large timeline context
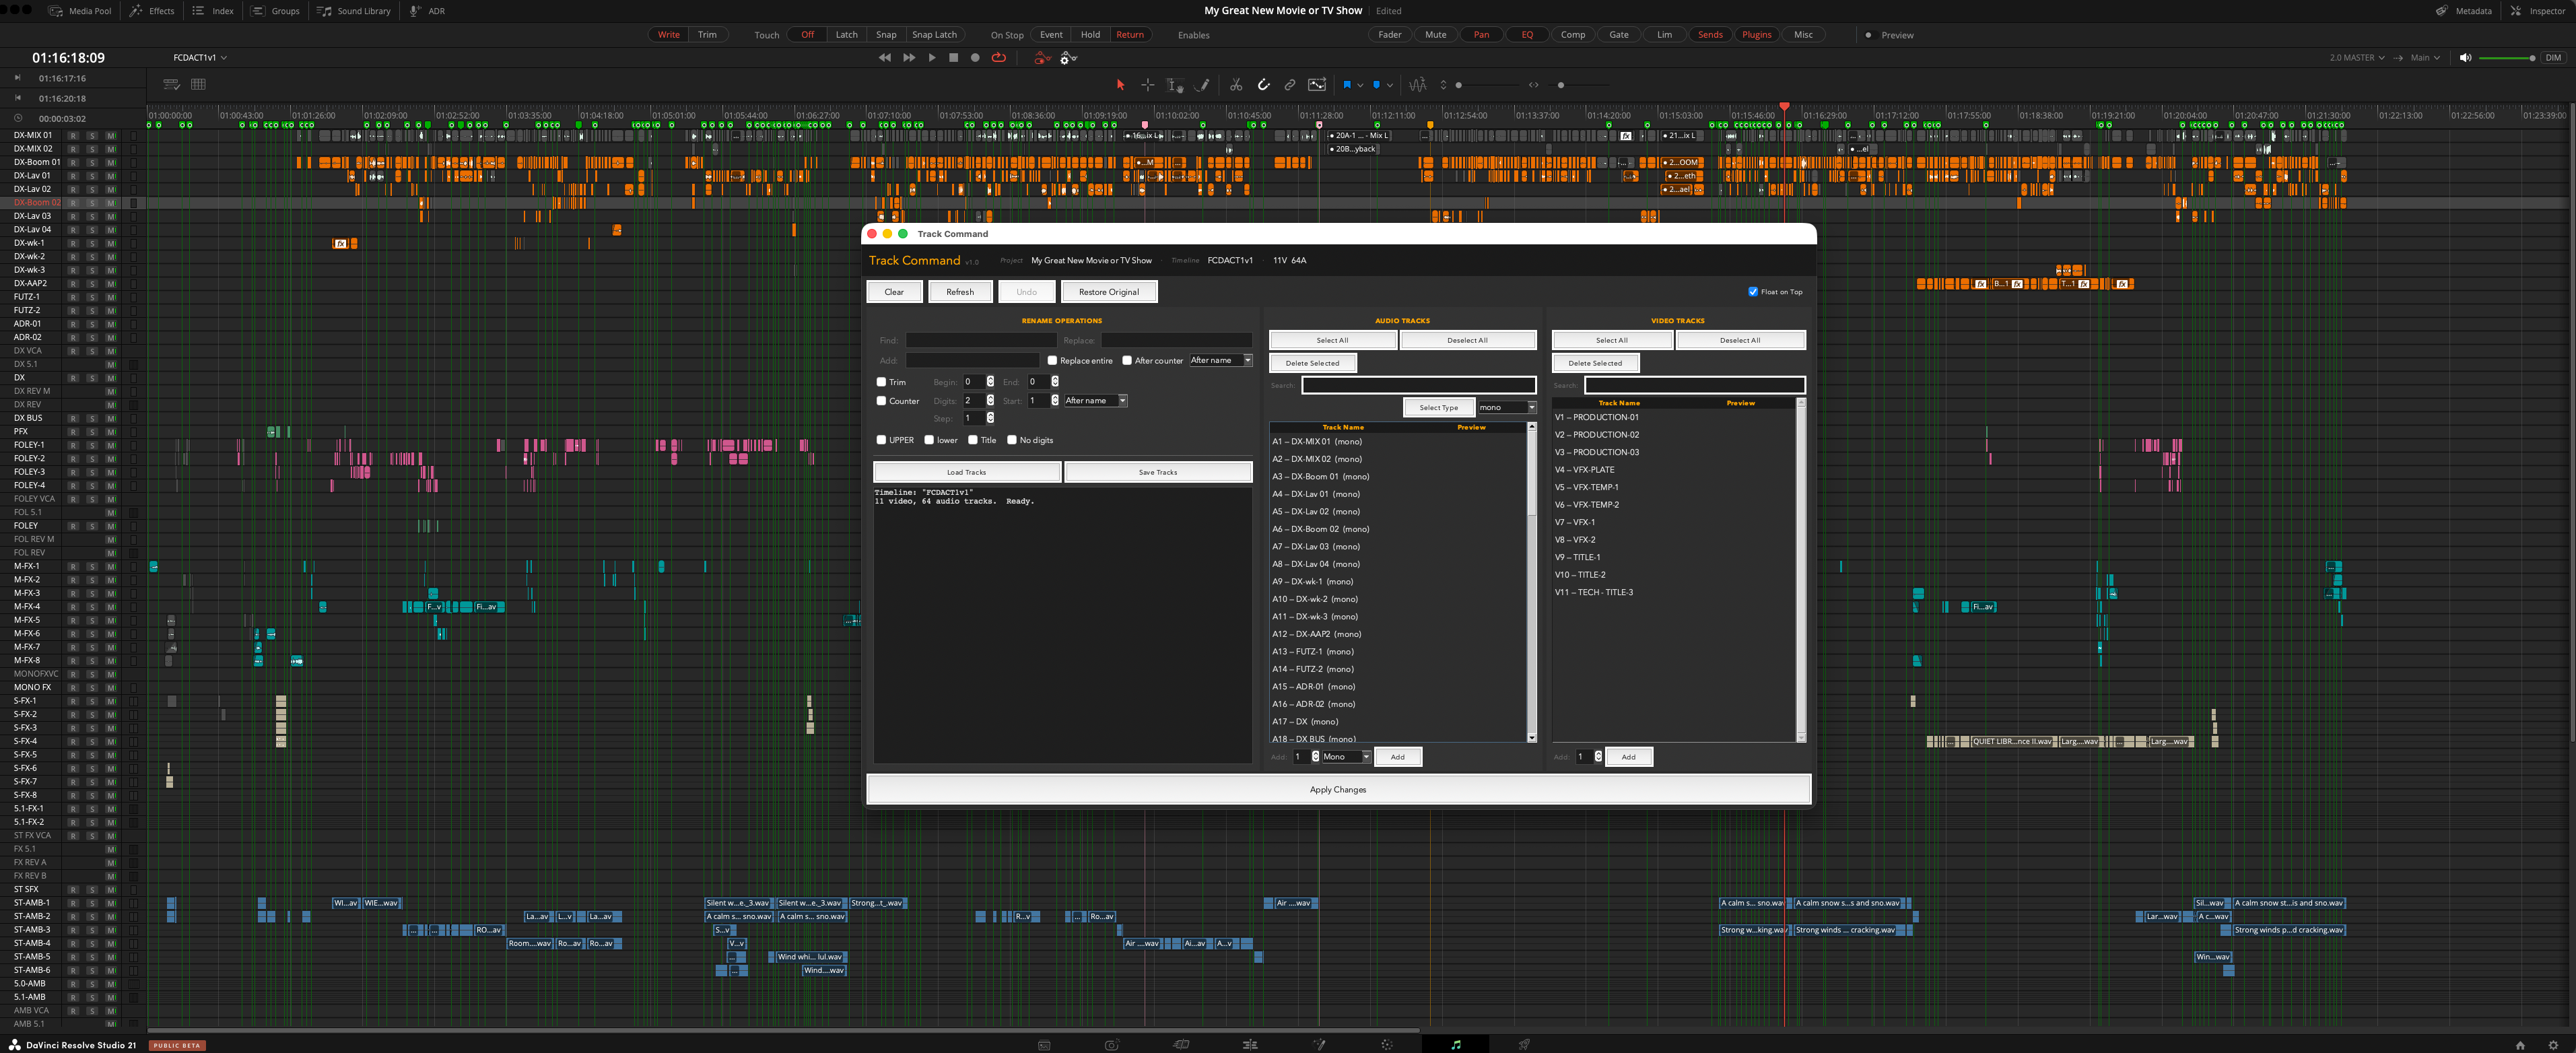
Track Command on a large production timeline — the app sits in the center while the full timeline is visible underneath.
Reference
Keyboard Shortcuts
| ⌘Z |
Undo last apply operation |
| Return / Enter |
Apply Changes |
| ⌘ + click |
Add individual track to selection |
| Shift + click |
Select a range of tracks |